Showing posts with label starting & charging. Show all posts

Wednesday, January 29, 2014

Bleak Midwinter

Not much happening lately.  We've had a succession of snowstorms that have cut into the available time for the Spit, and what time remains has been further eroded by work responsibilities.  It's hard to work on a car outside, in Colorado, in January.

But I did luck into a warm Saturday last weekend, and took advantage of it to get a little work done.  The new front brake rotors are installed, and, in the process, the front wheel bearings got a good cleaning and a dose of fresh grease.  The hub adjustment process is a bit arcane, and the end float (or bearing play, as I would call it) is a bit different from one side to the other.  I need to grab new cotter pins anyway, so I'll redo the adjustment once I have the new pins, and see if I can get better results next time.

While I was under the hood, I pulled out the battery so that I can begin the assault on the surface rust in the battery tray and the rest of the untreated right side of the bulkhead.  The rust in the battery tray looks significant, but not structural yet.  We'll wire wheel it down to bare metal, hit it with the rust converter fluid, prime, and paint.  I expect the job to stretch over the next couple weeks' worth of stolen winter work sessions.

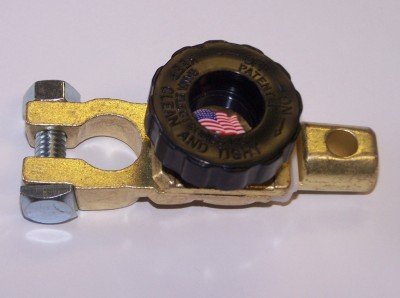
And while I had the battery out, I hooked it up to my battery charger and received an unpleasant surprise.  The battery seems to have drained and been damaged by the cold.  It's not accepting a charge now, which means I probably need a new $75 battery.  And I suppose I also need a battery disconnect switch so it doesn't happen again.  I have one of these on my battered old 4Runner:


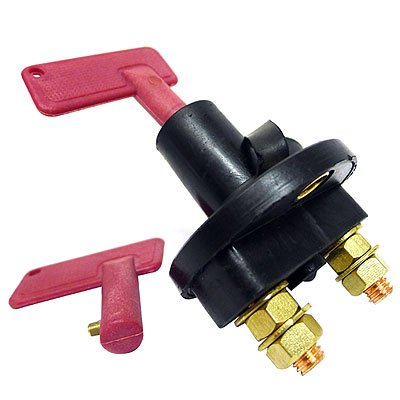
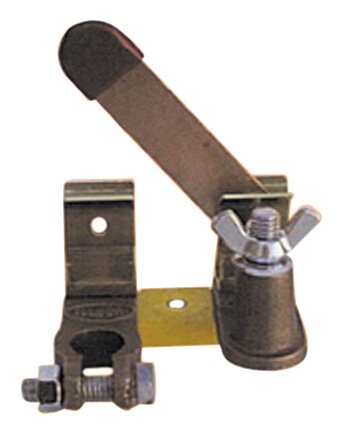
It would be nice to have a switch within reach of the driver's seat, but I'm reluctant to drill new holes through the firewall/bulkhead.  Perhaps one of these two options at right, if I decide the under-bonnet location works. 

Oh, and while I'm listing faulty parts, I noticed that the positive battery clamp is cracked and will need to be replaced.  That's a minor annoyance compared to the battery, but it still adds one more item to the to-do list, which was already frighteningly long.

Thursday, November 14, 2013

Getting Started With the Starter

One of the issues I face is the starter.  Upon turning the key, we get plenty of spinning noise, but no engine rotation. 

Clearly, the pinion gear was not engaging the ring on the flywheel.  Or perhaps the gears were so badly stripped that it was spinning but not able to drive the motor around.

My options: replace the starter with a $50 Autozone special, pay through the nose for a rebuilt Lucas model, or, if no prior owner had gone the Autozone route before, attempt to rebuild the faulty original one myself.  Since all of these options involve removing the bad starter first, that I did.

The process took all of 10 minutes.  As somebody who spent far too many hours trying to work on a SAAB 9-5, the Spitfire engine access was heavenly.

Upon removal, it was clear that it was indeed the original Lucas model, and therefore unlike any starter I had ever touched before.  It was also clear that the pinion gear was in fine shape, which was a relief.

As I understand it, modern starters use a solenoid to perform two tasks: to connect the heavy-gauge circuit that actually drives the starter motor, and to slide the pinion gear into contact with the  ring gear.  Well, this older design uses a separate solenoid to close the circuit, but relies on inertia and a helical grooved shaft to slide the pinion into place.

If the helical shaft is gummed up, the gear can refuse to make contact.  And it appears that is my problem - the gear was not sliding freely on the helical shaft.  This is good news, because it means I just saved $50 and learned something pretty cool, to boot.

I've always loved the intricate windings of electric motors, so I took it apart anyway.   The interior of the starter looked pretty good. There wasn't any sign of damaged bushings or other trouble.  So I left well enough alone and put it back together, hitting the helical shaft with a couple shots of WD-40 to loosen things up.

To be clear, this is a little half-assed.  It's anyone's guess how long the starter's been in there, and I should at least be replacing the brushes & bushings inside just on principle.  Some guys go a bit further, cleaning or replacing everything and repainting the shell.  

But getting to it is so easy, it doesn't seem like much of a missed opportunity to try it out now and pull it if there are problems down the road.  And the motor has clearly been spinning, and sounding good while doing so -- it just hasn't been engaging the ring gear and turning the motor.  

Besides, I'm trying hard not to fall down the rabbit hole of "perfect" right now -- my schedule and budget couldn't bear it.  The short-term goal is to get the machine running and driving.  Once that's done, I can make occasional improvements as time and money allow.  And if it turns out I love the car and can track down some workshop space, well, maybe I'll attempt a more serious restoration in the future.

Wednesday, November 13, 2013

What Have We Here?

I spent some of this morning familiarizing myself with the car.  Here's what I've found so far.

Weather-Proofing

I found the missing rubber strip for the driver's door, and it's actually in pretty good shape, so that's one less $30 tidbit to buy.  And I was able to press the passenger's side piece back into place.  The doors are fine now.

The brand new soft top in the trunk looks great, but the installation process is much more involved than I realized.  I'm missing some of the necessary fasteners, too.  I think, in the short term, my best bet is to keep the hard top on it and to rig a plywood & sheet plastic "plug" for the rear window space until I can get the glass replaced.

About the rear window: after checking with a Triumph forum for ideas, I had a couple options.  I found a place that sells replacement glass for $300+, but I also found Lexan sheeet at the local Home Depot for about $80.  And then, I checked with my local glass shop. They can fabricate a flat automotive laminate glass window for only about $90.  That's clearly the best option.  I need the rubber window seal ($120) before they can make the piece, and a little searching turned one up at Spitbits.com.  While I was there, I ordered the missing fasteners ($3.60) for the new top.

Battery & Starter

The battery is truly shot, not taking a charge at all.  I'll pull it before heading to work today, so I can get the core discount on the new one ($79 with core) at NAPA.

With the charger pumping out the 100A "start" current, I tried the starter.  It spun freely but wasn't engaging the engine.  According to my Haynes manual, it's either loose on its mounting, or the pinion is sticking on the sleeve, or it's shot.  I'll pull the starter and inspect it before I just buy a new one ($50 at AutoZone).

Miscellaneous

Aside from that, the only other progress was repositioning it with the front end on ramps, and a bit more inspection for rust.  There is a lot of surface rust in the engine bay.  I'd really like to brush it clean and paint it, just to keep it from worsening, but you can only do so much without removing things, and once you start removing things, where do you stop?  I'm really not able to take on a frame-off restoration right now.

Tuesday, November 12, 2013

Welcome Home, Little Spit!


I closed the deal on my new Triumph Spitfire tonight.  It's a 1974 model, red with a white factory hard top (and a black soft top too).

I paid $825 for it.  Depending on my perspective, that might seem like a smokin' deal: I've seen disassembled basket-cases posted for $750-900.  But they tended to be the rarer "soft-tail" Spitfires, which makes an apples-to-apples comparison tough.

And it's by no means certain that the car will ever fetch anything more than the purchase price plus what it takes to get it on the road.  It's got rust issues that are somewhere in that no-man's-land between trivial and terminal.  It's currently in non-running condition, with a possible bad starter and a probable need for a carburetor rebuild, and who knows what else once we get the motor turning.  The hard-top is missing its rear glass, and the interior is in very shabby shape.  I'm new to the British car hobby, but even I know that these costs can tend to balloon out of control.

So it's not a bargain, necessarily.  My dad always says "Body, interior, mechanicals - even a project car should have at least one of these things going for it."  If it weren't for the rust, or if the car were a driver, or if the interior was fresh - any one of those virtues might push it into "great deal" status.

Still, I'm pretty happy with my purchase.  I'll be even happier if I can sort a few things and get her on the road in the waning weeks of our Colorado Indian Summer.  We'll see....

So, What's the Plan?

The car's major needs are:

  • Weather-Proofing.  I have no garage, so our most pressing job is to get the hard top fixed or the new soft top installed.  Otherwise, the interior and rust issues will worsen over the winter.  Also, the window seals in the doors are bad, so water can flow down the windows and pool in the doors.  They'll rust out fast if I don't fix that, pronto. 
  • Brakes.  The previous owner (PO) installed a new brake master cylinder and started installing the rear drum slave cylinders, but the slave installation is incomplete and the lines haven't been hooked up yet.  E-brake is inoperable, too.
  • Battery & (maybe?) Starter.  Can't very well drive it, or even test the carburetor, if the car won't start.
  • Carburetor.  The ad describes it as needing carb tune or rebuild.  Once everything else is done, I'll need to figure this out to get 'er running.

The great news is that, except for the carburetor, these are not interdependent systems.  So I can run three parallel tracks:

  1. sourcing and installing a glass or Lexan rear window, gasket, and door seals; 
  2. jacking the rear up and getting the brakes together; and 
  3. testing the battery and starter with my battery charger.
So that's where we'll start tomorrow.